Painting Wall Murals - Drawing Grid Method
Although more advanced than painting wall murals with the projector method, another option for do it yourself mural painting is the drawing grid method. By drawing a square grid on your image and another square grid on the wall, you can draw a mural without using any special equipment.
Here’s how:
STEP ONE:
Select the image or design that you want to use for your mural.

STEP TWO:
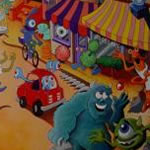
Using a ruler, carefully mark off equal-sized squares on your image. See the Illustration on the right for an example.
STEP THREE:
Measure and mark off corresponding squares on your wall. You will have the same number of horizontal and vertical squares as your smaller image, but the squares will be larger based on the scale of your mural. Verify that your lines are straight using a level.
STEP FOUR:
After you draw both grids, “match” up the squares on your image to the squares on the wall. This helps to break the image down into smaller segments, making the picture easier to draw and allowing you to maintain proportion. Using a soft pencil, draw your mural on the wall square by square, referring to your smaller image.
STEP FIVE:
After you have drawn your image and are happy with how it looks, erase the grid lines. Next, it’s time to paint! Use acrylic paints, although interior latex paints can be used for large areas of color.
STEP SIX:
When painting wall murals, use a wide, flat paintbrush to paint large areas first. Add details and outline images with a round paintbrush.
And for more information regarding painting wall murals, please visit our tips for selecting the right paints and brushes.
STEP SEVEN:
After the paint is completely dry, erase all pencil marks.
. . . That’s it!


Show & Tell
Upload photos of your murals or check out the submissions from other visitors to our site in the Show & Tell section of this website.

The pictures above are just a small sample of the inspiration that awaits in our visitor submission gallery!