The A-B-C’s of Alphabet Murals
Whether you want to paint separate letters or combine them to say something special, alphabet murals are a fun way to personalize your home’s decor. The options are endless – you can use stencils, rub on wall transfers, or even start from scratch.
Speaking of starting from scratch, check out the instructions below for one way to get your words on the wall.
To learn more about the alphabet mural shown above, please visit the website for the Kingston (Massachusetts) Public Library.
Creating Alphabet Murals with a Pattern and Carbon Paper
Writing freehand on the wall can be a scary proposition. There are easier methods. If the following doesn’t suit your project, check out my page about transfer techniques for other ideas.
STEP ONE:
After selecting the desired letter or phrase, decide if you want to use your own handwriting or a computer font.
If you decide to use a font, don’t limit yourself to the pre-loaded fonts on the computer. There are literally thousands of fonts available online (and most of them are free!). Feel free to use the search box below to see what’s available.
STEP TWO:
Create your pattern by getting the letters or phrase on paper, in the size that you want. If you are using a computer font, use your printer to try out different sizes until you get the right one.
For phrases, you may need several sheets of paper to create your pattern. It’s a good idea to number them and make sure there are no spelling or grammatical errors before starting.
STEP THREE:
Decide on the placement of your wall mural. To ensure that the finished product is straight, use a level and pencil to draw horizontal lines above and below the alphabet mural’s desired position.
STEP FOUR:
Place a piece of carbon paper between the wall and the pattern. The carbon side should face the wall. Tape both the carbon and the pattern to the wall and trace over the pattern outlines with a pencil. You may want to press fairly hard with your pencil to ensure the entire pattern is transferred to the wall.
STEP FIVE:
Lift away the pattern and carbon paper and verify the design is in the desired position. If the alphabet mural is a phrase, it is a good idea to verify it is straight using a level. This is the last chance to fix any errors, because the next step is painting…
STEP SIX:
That’s right, it’s time to paint. Alphabet murals can be outlined with a paint pen, and then filled in with acrylic paints.
That’s it!
Where to Purchase Aplhabet Murals
You can also purchase many different murals. If you are looking for kids’ rooms, there are several cute wallpaper murals.You might also want to check out canvas wall mural banners by Oopsy Daisy. These banners are not applied directly to the wall – instead they have decorative grommets in each corner and come with nails for hanging.
If you still need more ideas, please visit the Wall Murals Products Guide.


Show & Tell
Upload photos of your murals or check out the submissions from other visitors to our site in the Show & Tell section of this website.
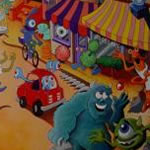

The pictures above are just a small sample of the inspiration that awaits in our visitor submission gallery!