Stencil Wall Murals
"Stencil...What?"
Yep, you read that right – stencil wall murals!
If you thought stencils were just for painting wall borders in your kitchen or adding character to old furniture, you were wrong!
This method will likely cost more in both time and money than using paint by number murals or starting from scratch using a projector, but your end result will likely have more detail and dimension than most do-it-yourself options.
Choices, Choices, Choices…
When using stencil wall murals, the level of detail is entirely up to you.You can purchase a kit that includes everything you need, down to the paints and brushes. Dressler Stencils, for example, has a great variety of wall mural kits. Generally, kits are a little pricier than other stenciling options, but the benefits may outweigh the price tag. Any guesswork is eliminated – that means you will likely be happy with the end results, and you should not have to make two or three trips to the store to purchase more paints or additional stencils.
The other option is to select individual stencils to make your vision come to life. Check out this photo gallery from Designer Stencils to see how others have combined individual stencils to create amazing wall murals.
And don’t forget to take a look at your local library or favorite book store. You may be able to find a book with ideas and instructions for stencil wall murals.
The First Step - Create a Convincing Background
The first part to creating great stencil murals is to select an appropriate background. Jungle murals, for example, will be a lot more convincing on a sky blue wall painted with clouds than on an ordinary white wall.You may even want to use a stencil to create your background. Brick walls or barn siding stencils are a couple examples.
Taking your time in the beginning will pay off big in the end, so make sure your background is just right before you move on the more detailed areas of your wall mural.
Next - The Focal Points
After you finish your background, you will need to move onto the focal points. What do I mean by focal points? Well, the “big stuff”.Trees, low garden walls, and trellises could be the focal points for garden murals.
If you are painting an underwater scene, your focal points could be large rocks or even a shark or other big sea creature.
When choosing the location of focal points, take a step back and look at your room closely. Think about the focal points in relation to your furniture and fixtures. They should complement one another, not compete with each other.
For example, a stenciled tree may look best in a corner of your room instead of directly behind your headboard. Or a stenciled pot may look better painted half way up your wall, so that it appears that it is sitting on an end table, rather than being painted down at the baseboard.
Last But Not Least…The Foreground and Details
Even though the foreground is painted last and consists of the “little stuff”, it’s just as important as your focal points. For example, imagine the garden mural mentioned above with only a tree – no birds or butterflies, no flowers and vines. Obviously, your mural will not be complete until you add the little details.Stencil Wall Murals - The "Basics"
Do you already know how to stencil? If not, below you will find basic instructions. These instructions are very general – for more information, you may want to check out a book at the library or explore other websites that discuss stenciling in more detail.
To become familiar with the way the paint handles and the shading effects you can achieve, it is a good idea to practice on paper before painting stencil wall murals. If you are having a difficult time deciding on the design placement, you may even want to tape the practice sheet on the wall after it is finished to give you a better idea of the size and scope of your project.
SUPPLY LIST
In addition to the actual stencils, there are a few supplies that you will need:
- Craft acrylic paints
- Stencil brushes
- Disposable paper plates
- Paper towels
- Painter’s tape or spray adhesive
It is a good idea to have several stencil brushes on hand. Your brush will need to be thoroughly clean and dry before you use it. If you are working with several colors, it can be a real problem if you have only one brush, because you have to allow time for it to dry before working on the next color.
You may also consider purchasing acrylic paint extender. By mixing one part extender with two parts paint, you can thin the paint and extend its drying time, which will allow for more control when shading and blending colors.
HANGING THE STENCIL
First and foremost, follow the manufacturer’s instructions. However, most stencils can be hung with painter’s tape. Many stencil wall murals consist of multiple overlays. Use a pencil to mark the position of the first stencil plate, so that you can properly align any subsequent overlays.
LOADING YOUR BRUSH
Use a disposable paper plate as the palette for your paint. Pour a small amount of paint on the plate, making sure that it is slightly larger than the head of your brush. Dip the tip of your stencil brush in the paint, and then blot the brush on a folded paper towel until the bristles are almost dry. Very little paint should be on the brush because you do not want the paint to run behind the stencil as you are working.
TIME TO PAINT
Hold the brush perpendicular to the wall surface. Apply the paint to the blank areas of the stencil plate using either a pouncing motion or a light circular stroke. If brush strokes are noticeable, blot the brush on the paper towel again to remove more of the paint. Paint all cut areas of the first stencil plate in this manner. Allow the paint to thoroughly dry before removing the plate and adding the next overlay. Repeat until the design is complete.
LAYERING DESIGNS
When working with stencil wall murals, you may find that you are layering designs to create the desired effect.
It is a good idea to block out the previously stenciled design with a light neutral paint. To accomplish this, hang your next stencil in its desired position and pounce on the light paint. Allow to dry, then stencil as normal.
THE “TEST DRIVE”
If you have never stenciled before and are apprehensive about taking on your project, break it down into smaller pieces and take a “test drive”. For example, before painting an entire wall with a stencil wall mural, purchase a couple coordinating stencils first and practice before investing in the wall mural stencils.
Alternatives to Stencil Wall Murals
One final thing – there are alternatives to stencil wall murals. With products such as Instant Stencils and Tatouage, you can create the “look” of stencil wall murals in less time and with substantially less effort than the traditional method described above. To find out more, make sure you visit our page about rub on wall transfers.


Show & Tell
Upload photos of your murals or check out the submissions from other visitors to our site in the Show & Tell section of this website.
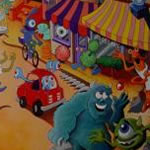
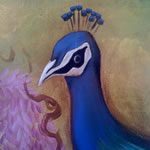

The pictures above are just a small sample of the inspiration that awaits in our visitor submission gallery!