Mosaic Tile Murals
It's "Faux" Easy
Love the look of mosaic tile murals, but can’t afford the price tag? I have the solution – faux mosaic tile murals!
That’s right – faux! Forget the tiles, put down the nippers, and stash the adhesives and grout. You won’t need them for this project.
Have I got your attention? Well, keep reading…
Getting Started
I assume you already have a design in mind. For the sake of explanation, let’s say that you decide to create a mural of an underwater scene in an 8x8 foot area.
On graph paper, use the measurements to draw the mosaic design to scale. One square on the grid is the equivalent of one inch on the wall. In our example, 8 feet equals 96 inches, so we would plot out the design on graph paper using 96x96 squares.
Include all elements of the design. For the underwater mural, this may include fish, plants, coral, and shells. Do not rush this part, because it is your blueprint for the rest of the project.
After you have finalized the design, it’s time to shop…
Shopping List for Faux Mosaic Murals
Some of these items you may already have - others you will need to purchase to create the perfect faux mosaic tile murals:
- Flat or satin finish latex paint for base coat – the “grout”
- Craft acrylic paints for mosaic design – the “tiles”
- Small foam brushes
- Several cellulose sponges
- Foam board
- Craft glue
- Paper plates
- Utility knife
- Ruler
- Transparent Mylar sheets
- Painter’s tape
- Carpenter’s level and pencil
Step by Step Instructions for Faux Mosaic Tile Murals
STEP ONE:
Apply the basecoat color to the wall. The basecoat color will be visible as the “grout” – keep this in mind when selecting the color. Also, select a color that contrasts with the main color scheme of the mural, so that the “tiles” do not blend into the background.
STEP TWO:
Use the carpenter’s level and pencil to mark the outer dimensions of the mosaic design. Also, refer to the grid drawing to mark the position of the mural elements and any borders or other focal point.
STEP THREE:
Create the background stamps for the mosaic tile murals. Cut one or two cellulose sponges into ¾ inch squares using a utility knife. Create the base for the sponges by cutting a piece of foam board into the following sizes:
2” x 2” – holds 4 sponge cutouts in square pattern
1” x 4” – holds 4 sponge cutouts in straight line
1” x 1” – holds 1 sponge cutout for small details
Using a ruler and pencil, mark one inch squares on the foam board cutouts. Center the sponge cutouts in the center of these squares, glue to the foam board, and allow to dry.
STEP FOUR:
Using the process described in step three, cut more foam board to size for the elements of the mural – in the underwater murals example, you would cut the foam board into various fish shapes, plants, and other underwater elements. Cut sponges in desired tile shapes and glue to the foam board shapes.
One word of caution – cellulose sponges are very absorbent. Once the paint is applied, it will not be possible to remove. Because of this, it is necessary to make a separate stamp for each color combination.
STEP FIVE:
Use a foam brush to apply the acrylic paints to the stamps. Blot the stamps on paper plates to remove any excess paint.
Remember, once the paint is applied, it is impossible to remove.
If you are unable to complete the design in one day, the painted stamps can be stored overnight in tightly sealed Ziploc bags.
STEP SIX:
Using the marked lines (see Step #2 above) as a guide, stamp the elements of the mural as well as any other focal points. Allow to dry.
STEP SEVEN:
Cut the Mylar sheets into shapes slightly larger than the ones used to stamp the mural elements – specifically, 1/8 inch around all sides. Use the Mylar shapes to cover and protect the previously stamped designs. Secure with painter’s tape on the back of the Mylar and place over designs.
STEP EIGHT:
Using the background stamps created in step three, stamp the mural background. The mylar sheets will protect the previously stamped designs, so go ahead and stamp over them.
STEP NINE:
Remove the mylar shapes from the stamped mural designs. Erase any remaining pencil lines.
And that, step by step, is how to create faux stamped mosaic tile murals!


Show & Tell
Upload photos of your murals or check out the submissions from other visitors to our site in the Show & Tell section of this website.

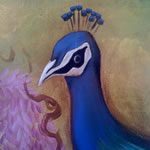

The pictures above are just a small sample of the inspiration that awaits in our visitor submission gallery!